In a previous article I had explained how, in broad strokes, we could obtain a bonsai from a branch or cut.
In that case it could be a simple branch (which we should immediately transplant and rest at least per year to generate roots) or collect a trunk normally on the slopes of mountains, hills or even rivers from which a branch derives but that has not completely detached itself from the earth.
In this case we have the advantage that some roots have already been generated and therefore the development process is faster.

Today I am going to take care of the slowest process to make a bonsai, but particularly the one I like the most: starting from the seed.
Create the bonsai from the seed.
Why would you ask?
Because the plant is going to develop harmonically from the beginning and all its elements are going to be developed in parallel and at the same time: trunk, branches, roots.
Our job will be to shorten the roots from time to time to prevent the plant from developing too much and preserve the aesthetics and principles of bonsai.
It will have neither more nor less value than any other bonsai. But it will be our work from the beginning to the end.
Times will be longer, but the growth will be optimal, also for the structure's shape, orderly and precise.
Bonsai seeds should be planted in spring or autumn.
Bonsai seeds, like many others in nature, should be planted in spring or autumn. We must sow in abundance because not all seeds will germinate naturally.
The seeds can be purchased from a specialized nursery or collected from the plant that we already have in our possession. Important: the land that houses the new plant must be poor in nutrition.
The seeds should be buried and wet and the plant should be kept in the shade until, over time, it begins to germinate and then changes to a pot.
Two examples of bonsai: the apple tree and the beech.
If we want to create a bonsai tree that we do not find in trade or we want to see it grow and develop from the beginning as a plant we can opt for the seed alternative.
In this article we will see how the seeds of a fruit tree (in this case an apple tree) and a common tree, beech, are planted.
The apple tree is one of the fruit plants, of domestic cultivation quite widespread, that best adapts to the cultivation of bonsai.
Beech is a long-lived and slow-growing tree that can reach 35-40 meters in height, with a straight and unbranched trunk, and an oval crown in its upper third that is perfectly suited for use as a bonsai. It is widespread in central Europe highlighting the forests of the Black Forest (Germany), the Soignes Forest and also Sart-Tilman in Belgium and the Irati Forest in Navarra (Spain). In Latin America it is in Patagonia.
In Argentina and Chile, for example, the species of the genus receive different names through their range and also several different species are called in the same way.
It is important to note that not all seeds of plants or shrubs are suitable for developing a bonsai.
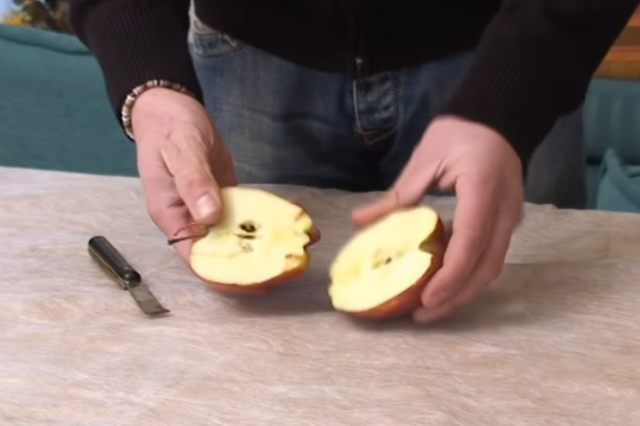
In the first case at hand, that is, apple seeds, it is advisable to separate them from the pulp, something that can be done well in the apple and dried perfectly.
Other seeds (especially forest trees that bloom in spring and bear fruit in summer) are covered with a woody stratum that protects them from the weather and winter's harshness, especially when the seeds fall to the ground and remain in the soil until Next spring they germinate.
Examples are chestnut trees, walnuts, almond trees and other similar species.
Seed and soil preparation.
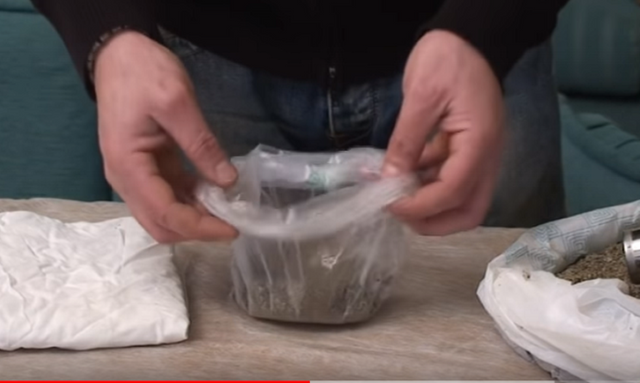
Before sowing these seeds we must artificially simulate winter so that they can rest in "natural" conditions. We presume to have collected these seeds at the end of summer by collecting them directly from the ground.
In a sachet containing sand and bonsai substrate we put the seeds and place everything in the refrigerator for a few weeks.
After this period, we remove the bag from the refrigerator and with a sanding letter (that fine one used to sand wood) we sand the bark well to try not to be so thick and in this way the germination of the seed is facilitated (the case par excellence is walnut).
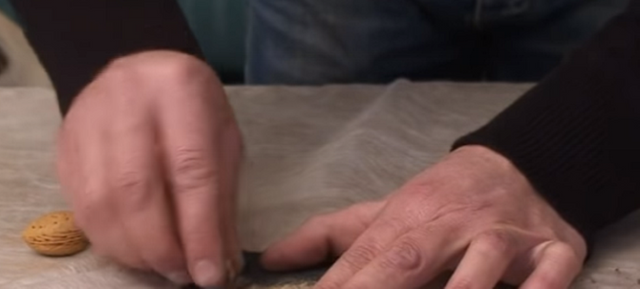
We can also make some holes in the bark being careful not to "hurt" the seed inside.
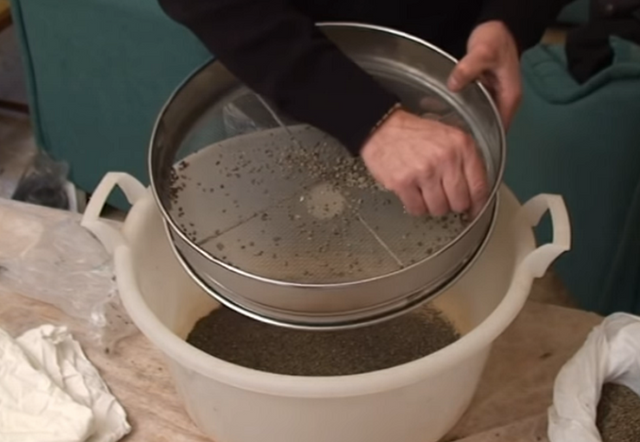
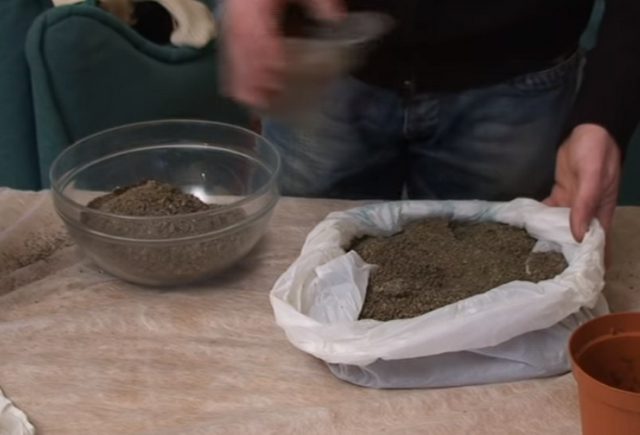
With a sieve or sieve we remove the impurities that have been left so that the seeds are as clean as possible, as we see in the image.
At this point we are already in early spring and with the seeds already ready and in a position to be sown. Mix in a pot equal amounts of sand and substrate for bonsai. We bury the seeds at a shallow depth - no more than a couple of centimeters - and water regularly until the plants germinate completely.
The following images illustrate the final planting process.
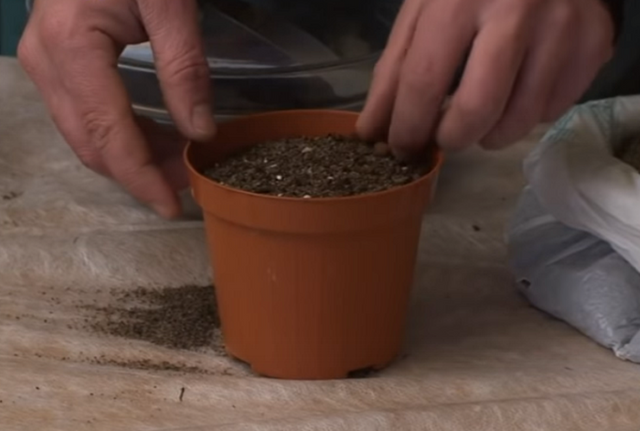
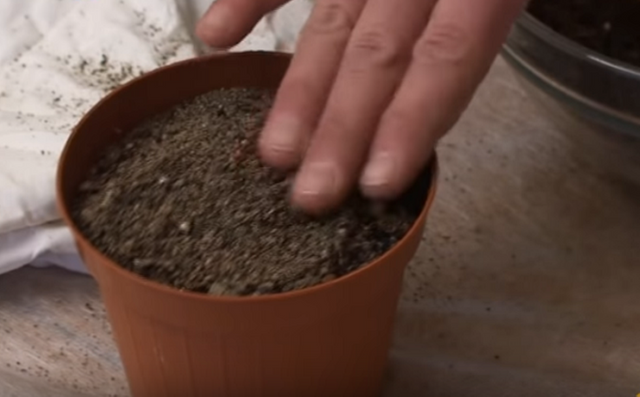
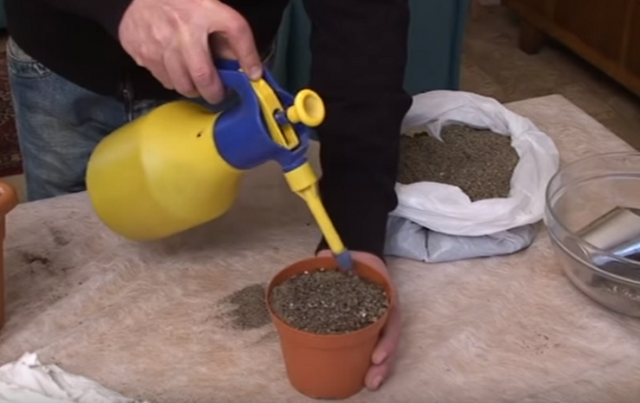
It is important that the soil inside the pot is not too compacted. You have to reorder it with your hands but without squeezing it too much. Water it preferably with a garden water nebulizer as shown in the image.
I collected these common beech seeds in the middle of the Italian winter of 2015 - January - in a Liguria forest (specifically in the Val Bormida) and planted them a couple of months later (March) at the beginning of spring.
The result.
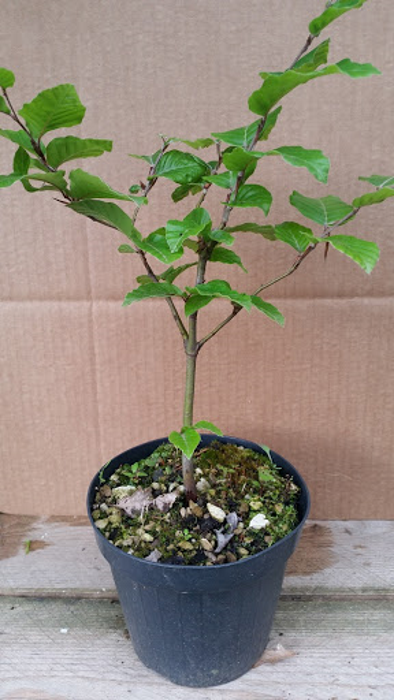
This is the result of the Haya plant (future bonsai) completed the first year of life.
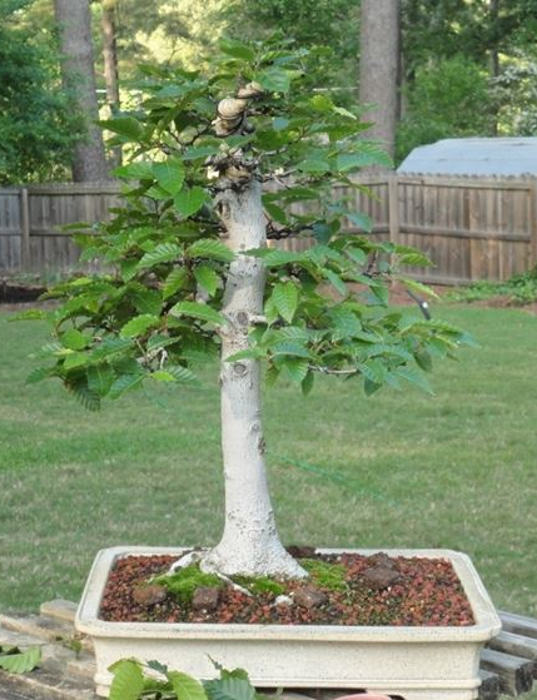
And this is what five (5) years of life looks like today.
Completed work?
Not at all. Now comes the most entertaining:
a) Give the shape you want to bonsai, that is, customize it, or as the Bonsaists say, define your style.
b) Systematically shorten the root to prevent the plant from growing, but at the same time keep its shape.
See you next time!
Great job. Truly congratulations!
ReplyDeleteThank you. It truly is a lot of work but when you see the end result it makes you proud of yourself.
DeleteGreetings and thank you for actively participating by commenting on the contents of the blog.